
You don’t need mountains to go mountain biking. Just about any off-pavement riding will reward you with fresh air, great exercise and—if hills or mountains are present—the exhilaration of scenic views and long downhill stretches.
Mountain biking does require some different skills than road cycling. This article shares basic techniques to help you get started.
Shop REI’s selection of mountain bikes.
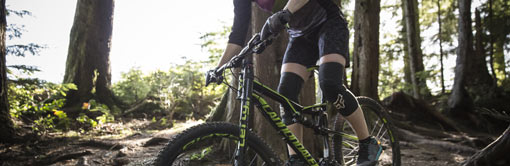
When you’re riding non-technical sections of trail, you want to be in a neutral position on the bike. This keeps you rolling along efficiently and comfortably while allowing you to easily transition into the ready position for technical terrain. The neutral position includes:
- Level pedals that are evenly weighted
- A slight bend in the knees and elbows
- Index fingers on the brake levers 100% of the time (rim brakes often require 2 fingers)
- Eyes looking forward about 15 to 20 ft. ahead; look where you want to go, not where you don’t
Body Position
Perhaps the biggest key to successful mountain biking is your body position.
Mountain bike trail surfaces include rocks, roots, ruts, sand or mud. The variable terrain and the potential obstacles are all part of the fun but can be unnerving to beginners. Being in the right body position helps you get through tricky sections of trail.
There are two primary body positions: neutral and ready.
Neutral Position
When you’re riding non-technical sections of trail, you want to be in a neutral position on the bike. This keeps you rolling along efficiently and comfortably while allowing you to easily transition into the ready position for technical terrain. The neutral position includes:
- Level pedals that are evenly weighted
- A slight bend in the knees and elbows
- Index fingers on the brake levers 100% of the time (rim brakes often require 2 fingers)
- Eyes looking forward about 15 to 20 ft. ahead; look where you want to go, not where you don’t
 Ready Position

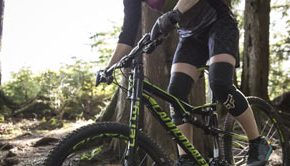
When the trail gets steeper or rockier, it’s time to move into the ready position (sometimes called the attack position). The ready position gets you mentally and physically prepared to take on technical sections of trail. The ready position includes:
- Level pedals that are evenly weighted
- A deep bend in the knees and elbows (think of making chicken wings with your arms with a 90-degree bend.)
- Rear end off the seat and hips shifted back
- Your back is flat and nearly parallel to the ground
- Index fingers on the brake levers 100% of the time (rim brakes often require 2 fingers)
- Eyes forward looking about 15 to 20 ft. ahead; look where you want to go, not where you don’t
Adjusting Your Seat Position
Positioning your seat properly can help you get in the correct body position for climbing and descending.
Climbing: For climbing, position your seat for maximum efficiency while pedaling. With your foot at the bottom of the pedal stroke, you should see a slight bend in the leg, reaching about 80-90 percent of full leg extension. This helps you pedal efficiently and powerfully using your major leg muscles.
Descending: When it’s time to descend, drop your seat about 2 or 3 inches from the height you set it at for climbing hills. Lowering your seat lowers your center of gravity, which gives you better control and more confidence through steep descents. You may need to experiment with different seat heights to find what feels best.
Learn more technique for climbing and descending in our Mountain Biking: Climbs and Descents article.
 Picking a Line
A beginner’s mistake is looking at spots you want to avoid rather than focusing on where you want to go. Pick a path and stick to it to get over and around tricky sections of trail.
What hazards should you look for? That depends on your skill level. A log that will stop one cyclist may be a fun bunnyhop for another. Generally, look for loose rocks, deep sand, water, wet roots, logs and other cyclists, hikers, and animals.
To find your line: scan ahead for hazards by looking about 15 – 20 ft. down the trail. Then, move your eyes back toward your tire. Doing this up-and-back action allows your eyes to take in lots of information. Knowing hazards ahead of time can help you adjust your balance and pick a line around them.
 Braking
Braking seems simple: you squeeze the levers and the bike slows down. That is the gist of it, but learning more about how to brake goes a long way in making you more comfortable and secure on the bike.
How to Brake
Braking should be consistent and controlled. Most of your braking power comes from your front brake, but grabbing a handful of front brake will send you over the bars. Instead, lightly apply the brakes, and do so evenly on the front and back brakes. Avoid sudden, fast squeezes to help prevent skidding.
While braking, brace yourself by moving your hips back, dropping your heels down and keeping a slight bend in your knees and elbows. This body position helps you stay in control and from getting too far forward on the bike.
If your mountain bike has disc brakes, keep the index finger of each hand on the brake levers and your other three fingers on the handlebar grips. This gives you sufficient braking power and control while riding. If you have rim brakes, try two fingers on the brake levers since they typically require more force to engage the brakes

When to Brake
When approaching a turn, brake before you hit the turn, and then let your momentum carry you through. This allows you to focus on your technique through the turn and exit the turn with speed.
Momentum can also be your friend when getting up and over obstacles in the trail. Beginner riders often slow way down when approaching obstacles. Controlled momentum can help you get through these tricky sections of trail.
Shifting
Since most mountain biking involves at least some ups and downs, it’s good to know how to shift your gears properly. Proper shifting habits not only save wear and tear on your bike (especially your chain, front cassette and rear cogs), they enable you to power yourself more efficiently up and down hills.
 Shift often: Beginning riders should practice frequent gear shifting. This builds muscle memory so you can intuitively shift up or down as needed without having to think about whether you’re shifting to an easier or more difficult gear.Shift early: Don’t wait to shift until you’ve already started up that big hill. Always shift to the gear you will need before you hit the steep terrain. This allows you to keep a steady cycling cadence for maximum power. It also prevents awkward shifting under a load that is hard on your gears and could cause your chain to pop off.
If you have trouble finding the right gear for the terrain you’re riding, err on the side of spinning in an easier gear than mashing in a hard gear.
Another important rule is to prevent cross-chaining. This occurs when your chain is stretched awkwardly across from the small chainring in the front to the small cog in the rear, or the big chainring in the front to the big cog in the rear. This holds true for double and triple chainring setups. Cross-chaining can result in your chain popping off from the strain; it also stretches your chain over time, shortening its lifespan.
Finally, always remember to keep pedaling as you are shifting. Not pedaling as you shift can damage or break the chain.
Learn more about shifting in our Bike Gears and Shifting Basics article.
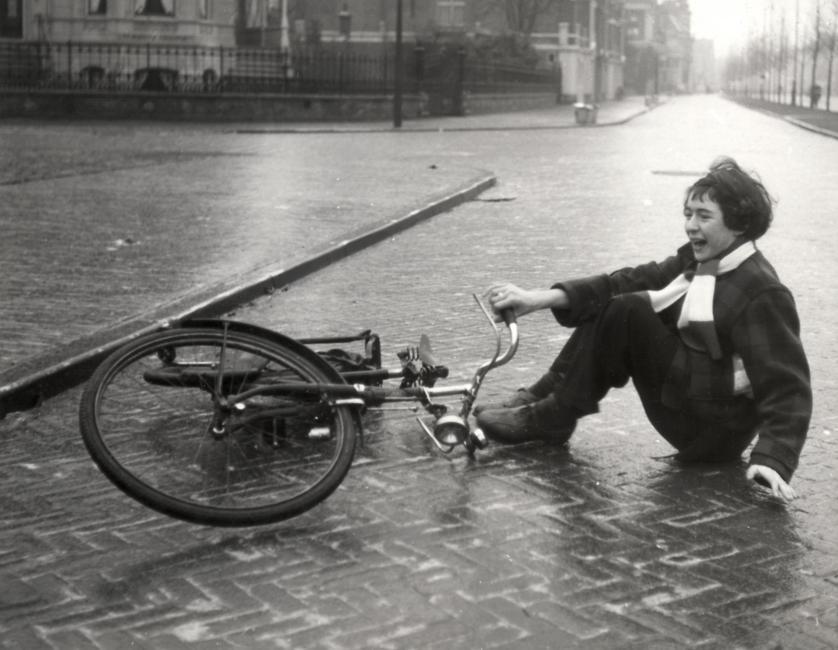
Falling Off
No one likes to fall off a bike, but if you’re mountain biking, it’ll probably happen at some point.
When you fall off your bike, try to keep your arms in. Your instinct may be to reach out to brace your fall, but this can result in a broken wrist or collarbone.
During a fall, most damage is limited to personal pride. Pick yourself up, dust off and check to make sure you’re not injured. Then check your bike. The seat or handlebar may have twisted and the chain may have come off.
Check your brakes and gears, too, before charging on. A trailside repair or adjustment may be needed, so it’s wise to carry a multi-tool and a small first-aid kit to patch any personal scrapes.
Hiking the Bike
As you ride the trails, you’re bound to get into a tight spot eventually. If you get in a rut on the trail, don’t “fight the bike.” Just do your best to ride it out. Impossible? There’s no shame in stopping and walking it out. Walking is absolutely an accepted part of mountain biking. Many trails feature mandatory hike-a-bike sections that are too difficult to ride through, up or down.

Trail Etiquette
Mountain biking is often done on trails or roads shared with other users, such as hikers and horses. Always be a courteous and responsible rider and be in control of your bike. Ride only on trails open to mountain bike use. Here are some of the most important rules:
- Always yield right-of-way to cyclists traveling uphill (in singletrack, stop completely and lift the bike out of the trail).
- Slow down when approaching hikers or horses and give them a wide berth. A good approach to dealing with horses is to take direction from the horseback rider.
- Let other trail users know you’re coming — give a friendly greeting.
ndly greeting.

Get involved!
Comments